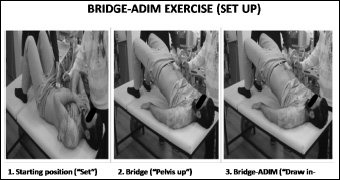
Figure 1.
Illustration of the set up for the Bridge-ADIM exercise.