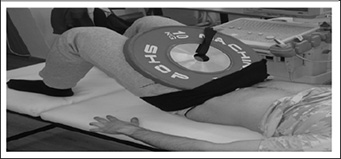
Figure 2.
Illustration of the proper weight placement over the hip joint.