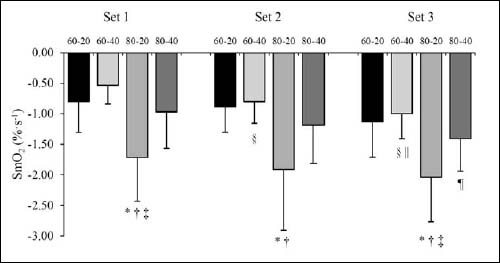
Figure 3.
Comparison of SmO
2
decline slope across three sets under different experimental conditions.